
Create or Update a Menu
You can easily create a new navigation menu or edit an existing one from the WordPress Dashboard.
How to Access
Navigate to:
Appearance → Menus
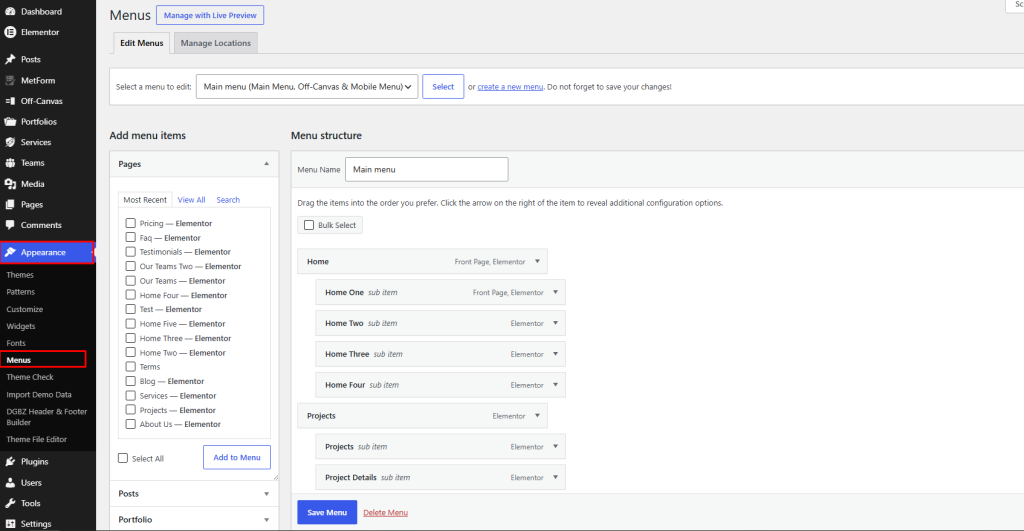
Create a New Menu
- Go to Appearance → Menus.
- Click Create a new menu.
- Enter a Menu Name.
- Click Create Menu.
- Select the pages, posts, or custom links you want to add.
- Click Add to Menu.
- Drag and drop menu items to reorder them or create dropdown (sub-menu) items.
- Assign the menu to the desired Display Location (if required).
- Click Save Menu.
Update an Existing Menu
- Go to Appearance → Menus.
- Select the menu you want to edit from the Select a menu to edit dropdown.
- Click Select.
- Add, remove, rename, or reorder menu items as needed.
- Click Save Menu to apply your changes.
Managing Menu Items
You can perform the following actions:
- Add New Items – Add pages, posts, portfolios, services, categories, or custom links.
- Reorder Items – Drag and drop items to change their order.
- Create Dropdown Menus – Drag an item slightly to the right beneath another item to make it a submenu.
- Remove Items – Expand a menu item and click Remove.
- Rename Navigation Labels – Edit the Navigation Label without changing the page title.
Note: After saving your menu, refresh the front end of your website to verify that the changes are displayed correctly.